The Technique of Panel Icon Painting
The medium used in most traditionally painted icons is egg tempera, which requires a rigid support. Panels for icons are made of solid wood, usually poplar or mahogany , varieties of wood which are chosen for their stable, non-warping qualities. Solid oak struts are inserted in grooves cut into the back of each panel, across the grain to retard warping. Most panels are constructed with raised borders on the surface of the icon which also counteract warping--as well as helping to define the icon spatially.
Paint cannot be applied directly to the wood itself. A complex panel preparation is required for proper and permanent adhesion of the paint. The panel is saturated with two coats of hot hide glue, which penetrates the fibers of the wood. Each coat is allowed to dry thoroughly. A piece of linen cloth cut slightly larger than the panel itself is soaked in the hot glue, and carefully applied to the panel and allowed to dry. This phase can take several days, depending on weather conditions.
The dried, linen-covered panel is then sized with two more coats of the hot hide glue, to which have been added a small amount of powdered marble, to give it more “tooth” and substance. After drying overnight, the panel is ready for painting with multiple coats of gesso, a white, plaster-like preparation made of marble dust, water and the hide glue. The gesso, when gently heated has the consistency of heavy cream, and when brushed on in thin layers, it dries to a hard, permanent surface. The first few coats are applied and rubbed by hand into the rough ‘tooth’ provided by the linen. Thin coats of gesso follow, one after the other, and when done, 15 to 20 thin coats of gesso create an extremely durable surface.
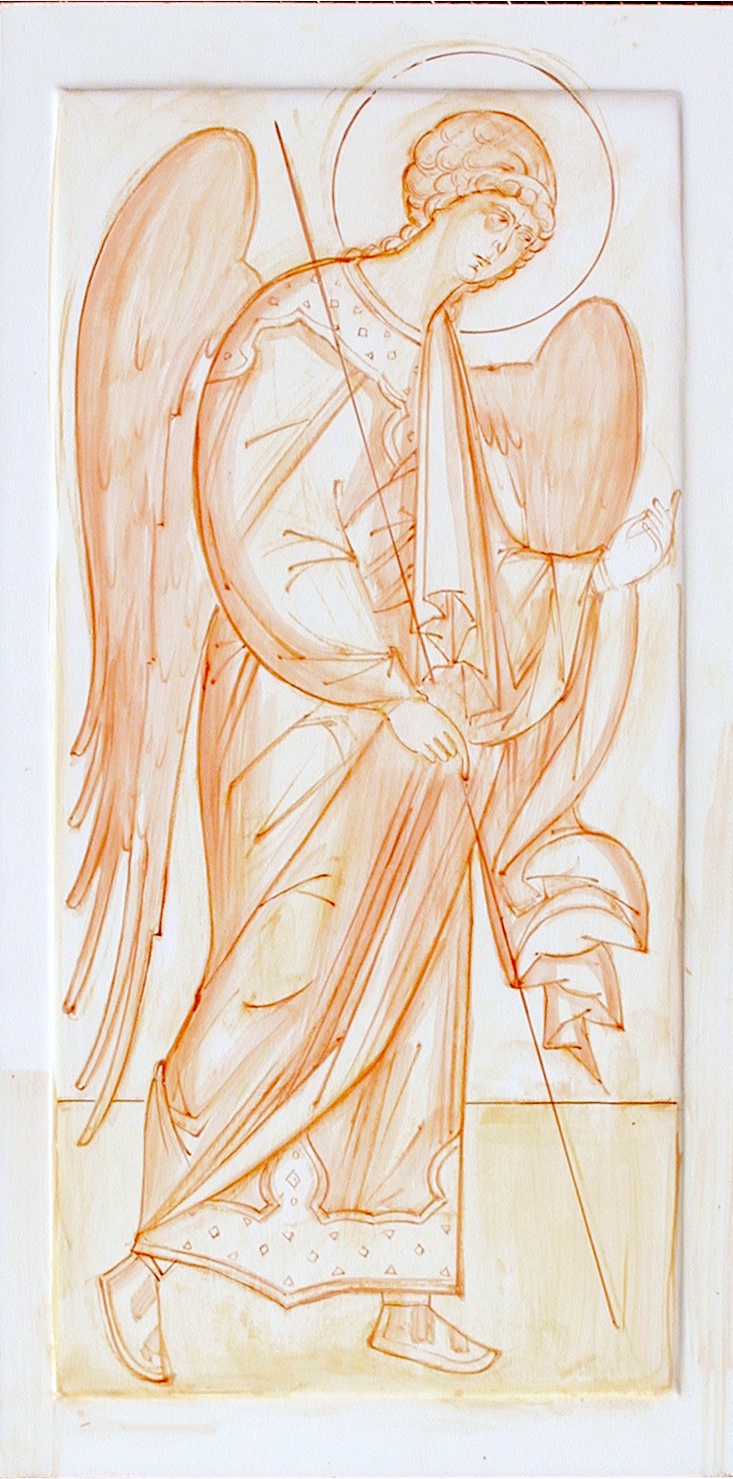
When the gessoed panel has thoroughly dried (a seasonal matter--thorough drying can take a number of days) the surface is carefully sanded and polished to a marble-like smoothness and only then does the painting begin. Usually a general sketch in sepia-toned pigment and water locates the subject on the panel, and establishes the proportions and composition. This preliminary drawing gradually is replaced by a more defined drawing and a little egg yolk is added to give the sketch some permanency. Pigments are, for the most part, finely-ground stone, earth, and minerals, and if applied with water alone will rub off when dry. Egg tempera is a medium of unsurpassed beauty, proven permanency and stability over time. It is the egg yolk that gives centuries -old icons their lasting quality. We have egg tempera icons centuries old, which, when cleaned, have retained fresh, vivid colours and an unflawed surface. Oil painting, on the other hand, after a comparatively short time dries out, cracks and flakes. Modern acrylic-based paints tend to become brittle, dull and lifeless when dry, and have the further problem of being inherently opaque--lacking the translucence possible with egg tempera which has always been a striking feature of icons.
Photos of the initial sketch made on the newly gessoed panel:


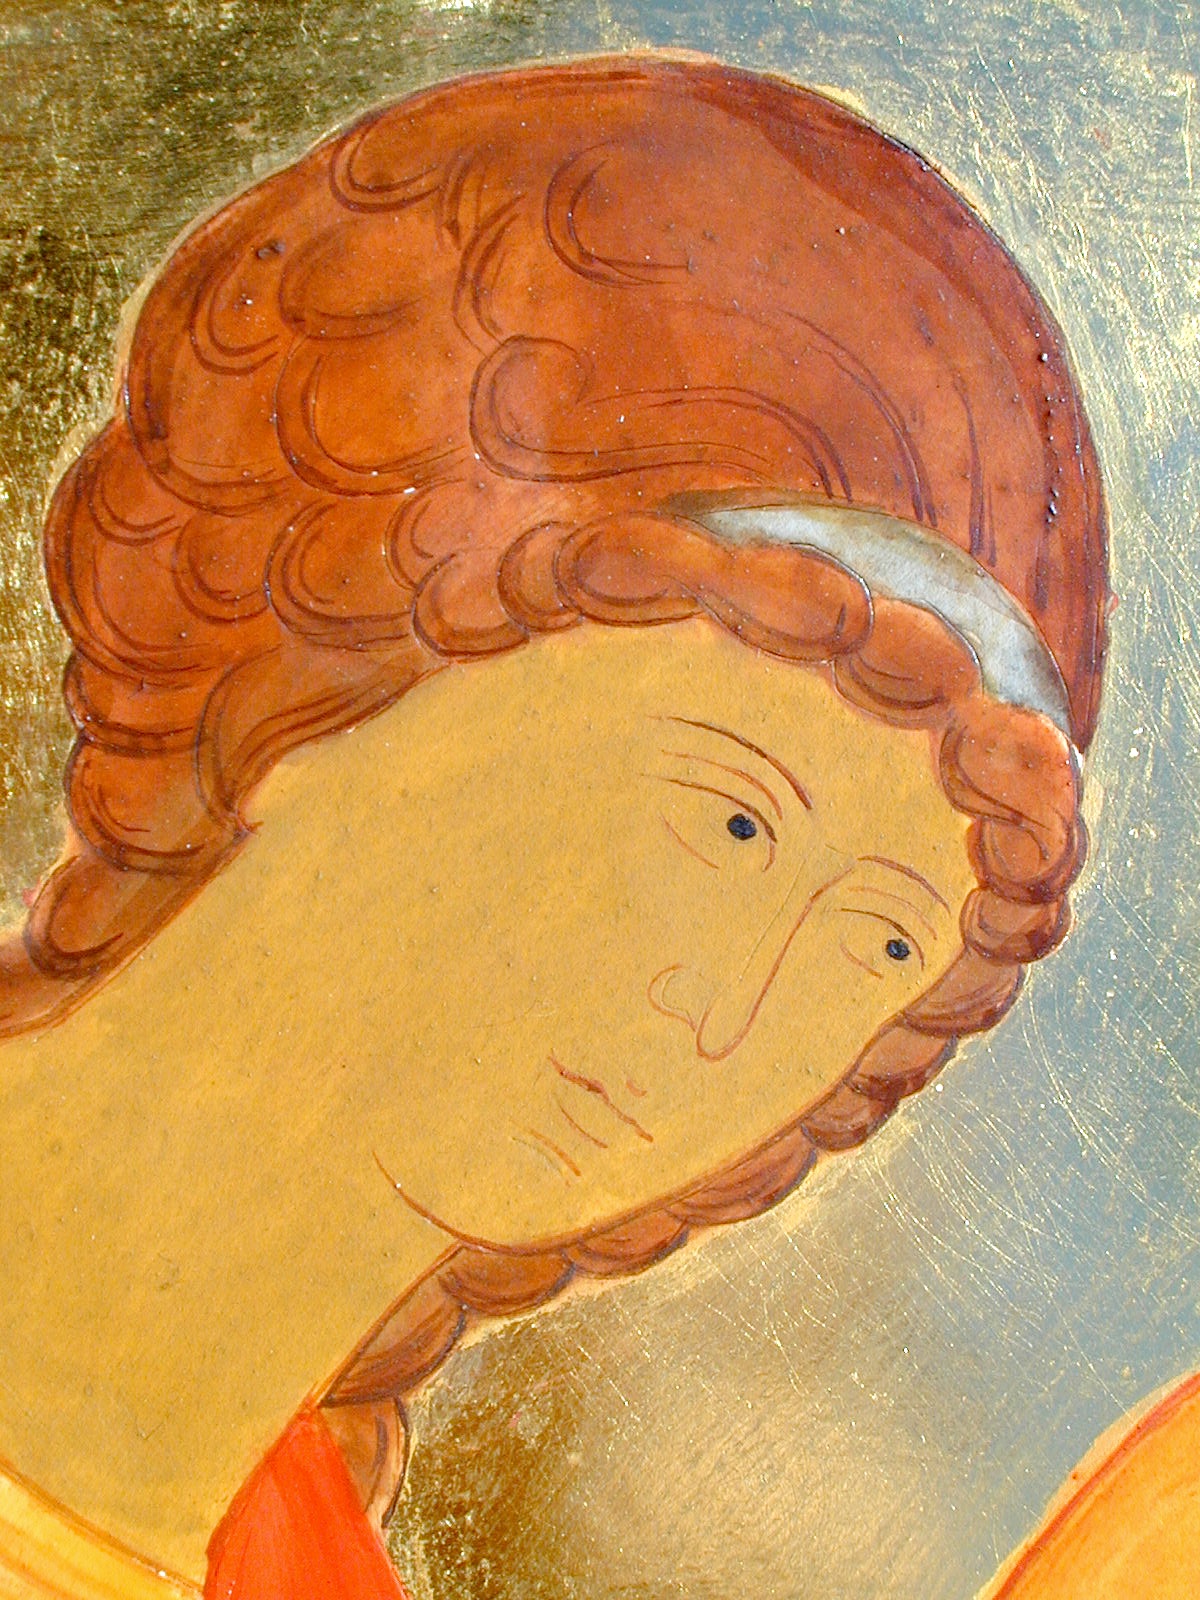
If the background is going to be made of gold leaf, it is usually at this stage, once the drawing on the panel has been completed, that the gold leaf is applied. Twenty three karat gold is the norm for gilding icons. Small nuggets of gold are been pounded out until they become extremely and uniformly thin. There are two different methods to apply the gold. The first is called “water gilding”: 4-5 layers of yellow clay bole, containing some hide glue, are painted onto the gesso and polished when dry. A sable brush is used to float a puddle of water onto the clay bole, and a loose sheet of gold quickly laid onto the surface of the puddle of water, which then sinks into the clay, pulling the gold onto the wetted, and temporarily adhesive surface. When dry, the gold is burnished with a smooth canine tooth-shaped implement called a burnisher which makes the gold extremely smooth and reflective. In Russia the burnisher is almost always a wolf’s tooth; elsewhere, agate is used. Another method of gilding is called Mordant gilding. Here, we apply a layer of an oil based glue where-ever the gold is to go. When the glue becomes tacky, the gold is applied and left at that stage. This kind of gold cannot be burnished.
Photos of the water gilding technique (the panel with clay bole applied and the gilded panel, after burnishing):
Application of the clay bole.


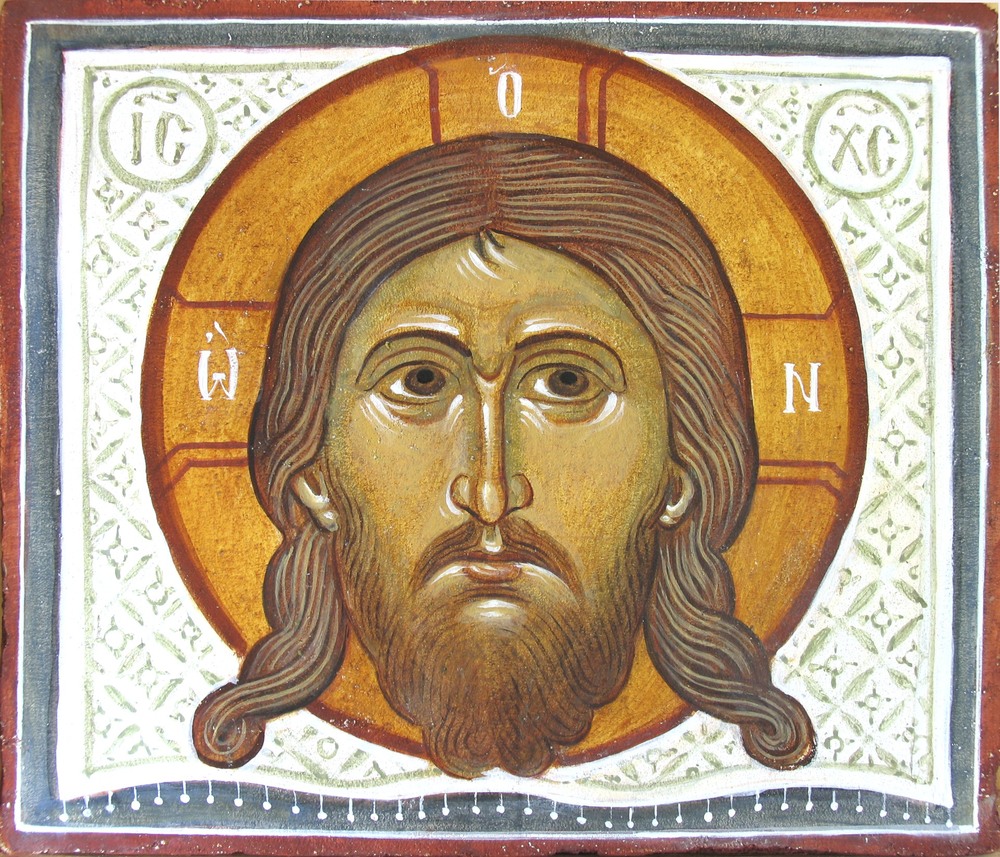
Once a satisfactory drawing has been completed, and the gold is laid, the base colours are painted onto the gessoed surface. With the base colours down, the iconographer applies lighter colors, building up the forms and shapes, and continues painting with combinations of glazes, lines, and variety of thicknesses of color. The iconographer adds the inscriptions and titles that identify the icon. No icon is complete without the name of the saint or of the feast depicted. Under no circumstances does the iconographer sign the icon. This western practice has become common in some Orthodox workshops but is practically unknown in traditional iconography: the few attested exceptions prove the rule. The icon depicts only what is necessary, and that does not include the name of the painter or the workshop where the icon was made.
Leonid Ouspensky (1902-1987) always said, with regard to learning the craft of icon painting, that, “the best teachers are the ancient icons.” That remains true for any iconographer concerned for traditional painting. In addition to the several manuals specifically written to help the painter understand how a given subject is to be presented, photographs and books on old icons aid the painter in understanding the tradition. While actively painting, the iconographer is always studying the work of his predecessors, drawing and reflecting on the achievements that have been passed to him.
Painting of the flat colors:

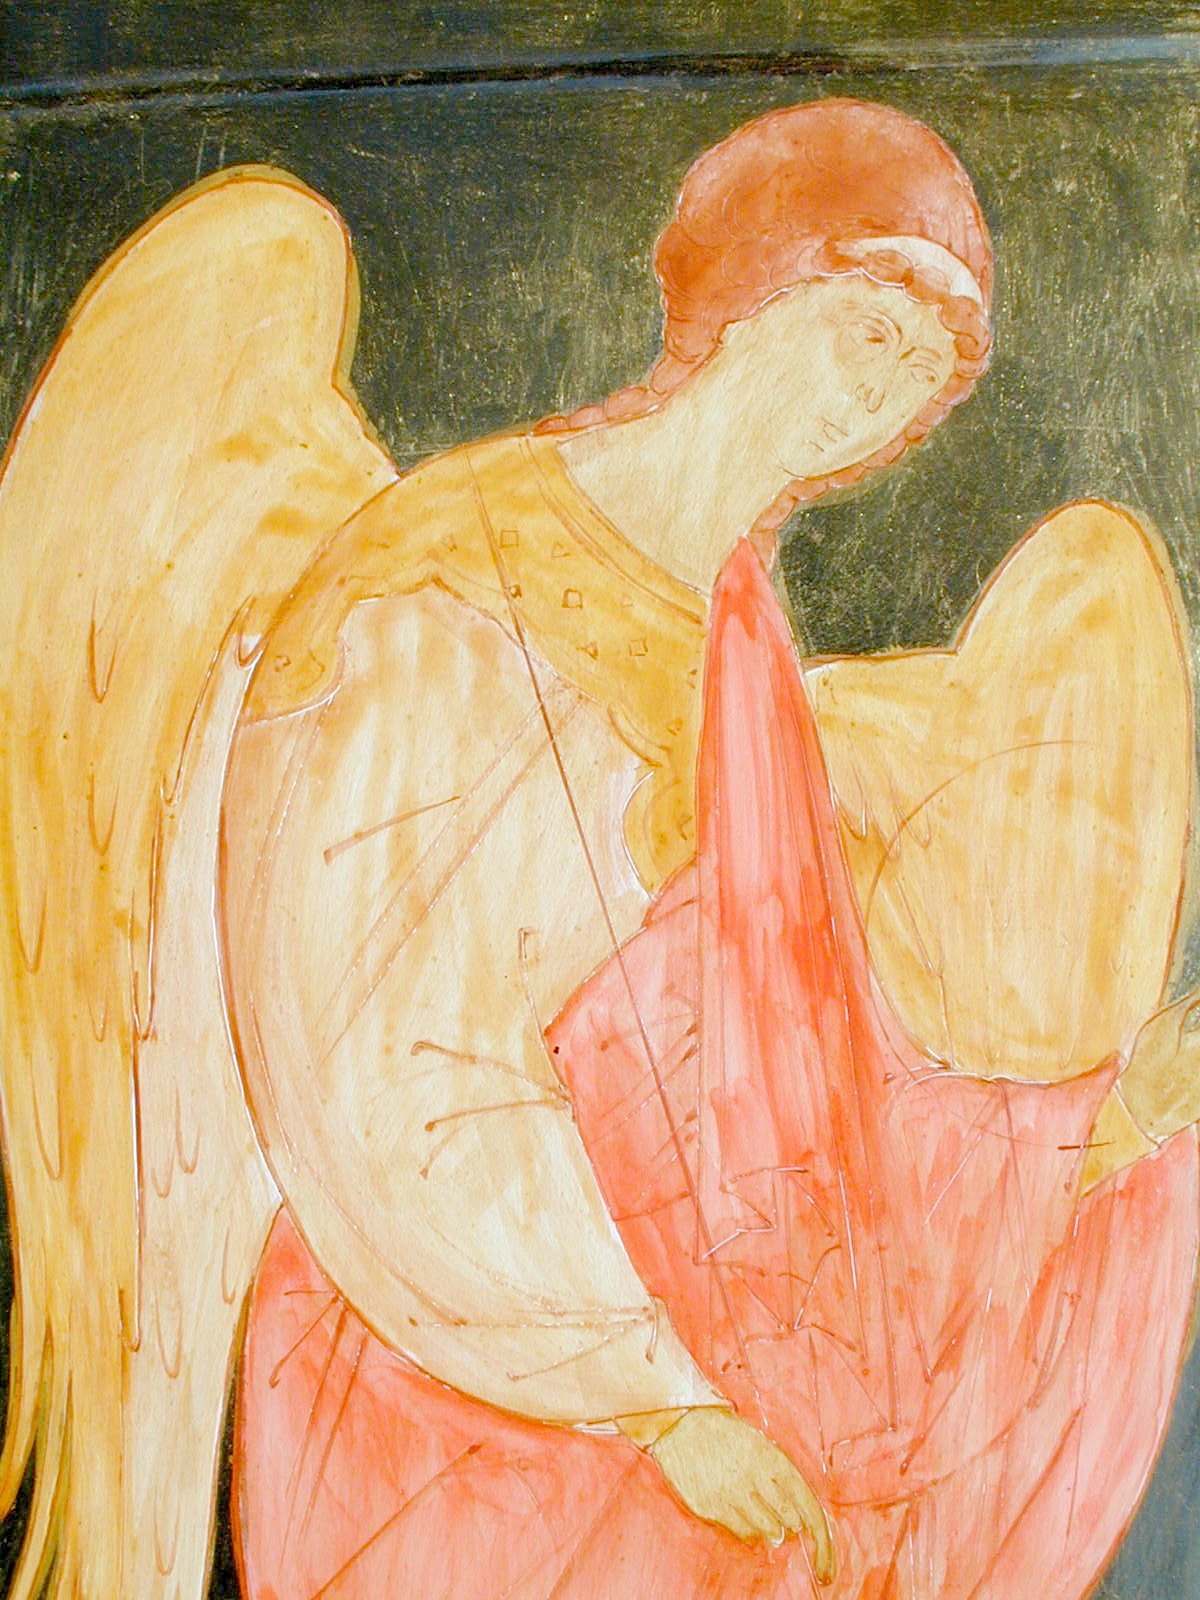


Painting of the lighter colors to build up forms and shapes:


The completed icon:


Detailed photos of the whole process, focusing on the face:


When the painting is done the icon is set aside and allowed to dry completely. This can take a long time and again, much is seasonally determined. When all is done and well dried out, the final work begins--applying the varnish which has been used at least since the Middle Ages and which ensures that the painted surface will “lock together” and have a protective surface. The varnish also deepens and enhances the colours.
The varnish used is made of linseed oil and additives to hasten the drying process. Depending on humidity, varnishing usually takes the better part of one day--10 hours from first to last, but we have had panels whose varnishing has kept the community up literally all night. The icon is laid flat, and the varnish poured over it in a thick coat. Throughout the day, the varnish is absorbed by the paint, as it thickens, and forms a film on the surface of the paint. At a certain point the varnish becomes viscous, and only experience and the discernment that comes from experience indicates when that moment has arrived. At that point the excess varnish is scraped off, leaving the final varnish coat behind. Once again, the panel is set aside to dry for days. (For more details on the technique of varnishing, click here.)
The icon is taken to the church and blessed by the priest before being given to the individual who commissioned it, or prior to its installation in church.